5 Simple Steps to Organic Lasagna Gardening – by Guest Greenie Kris Hackbart

I love gardens and I love harvesting fresh veggies from the garden, but I hate to dig! I do own a shovel, and a garden fork, but the idea of digging up the sod for a new garden bed is just not on my list of loves. So I’ve come up with a great way to garden without digging. Actually it’s not really new, lots of people do it, but here’s my method for a no dig garden, also known as a sheet composting gardening or lasagna gardening.

Here are my simple 5 steps to get you started.

Step 1: Plan it.

When designing what my garden bed will look like, I like the mower method best. The mower method is where I mow the area I want the garden to be. When choosing a shape for your garden you can use a garden hose to create a free form shape.

During springtime in Minnesota, we are lucky to be able to see the grass, so there isn’t much difference between where I mowed and not. However, can you see that convenient shadow in the photo above? It happens to land right where I want to add on to my first No-Dig Garden.

Step 2: Scalp it.

When I mow, I take the mower all the way down to the ground, using as low of a setting as possible, and mow the grass out the area that I want to create the bed. It won’t really get the grass roots, and it’s not even necessary, but it’s a good step to take.

Step 3: Cover it.

To cover the area I like to use burlap bags, since I can get them free at the coffee roaster. You can also use old organic cotton towels or sheets, newspaper or even a biodegradable weed barrier. Just cover up all that super-short grass with a material that water can penetrate, but weeds and grass won’t. I simply laid the burlap bags down on top of the grass, overlapping it just a little bit.

(Make sure your cover is decomposable, do not use polyester sheets or old carpet. The idea is that all of this material will compost and become part of your garden.)

Step 4: Mulch it.

Remember when you mowed? Take all those grass clippings and cover up the burlap or paper with a nice thick layer of mulch. I use grass clippings and leaves as mulch on my gardens all summer long. If you like to decorate with straw bales in the fall, you can take them apart and put down a 4-6 inch thick layer on your garden. If you have a bin of compost ready, you can use a 4-6 inch layer of it, either under or over the mulch.

Step 5: Plant it.

Now it is time to plant your seeds, seedlings and bulbs. If the layers are nice and thick and loose, you’ll barely even need a trowel. I planted the flower bed with my fingers. Seedlings may require a little more dirt moving. If you used newspaper or old linens, you can poke a hole in the material for the roots to grow. If you are using burlap, the roots will grown right through it on their own.

Now you have a new raised garden bed! You will want to water the bed as needed and once the plants start to get tall, keep mulching around them. You can put down more newspaper or burlap under the top mulch if you would like, just make sure it’s compostable. Next year you might want to add another layer of compost, or you might get energetic and build a box around your now raised bed!

Guest Greenie: Welcome Kris.

Today, I’m introducing a new feature: Guest Greenies. Guest Greenies will share with us their favorite green projects, recipes, hobbies, design, food and anything Earth friendly that they want over the course of a week.

Please join me in welcoming our first Guest Greenie:

Kris Hackbart of The Big Boat. Kris was raised in the suburbs by a farmer, and probably pulled carrots out of the garden before she could walk. She has always composted, canned, recycled, reused and reduced. In fact, she thinks she was green before it was popular! After all that’s it’s not too surprising since her first real job was as a Soil Conservationist. Right now you will find her caring for her little kid creations, crafting, gardening, and writing about everything that she loves.

Here is a quick intro from our guest:

Hi! I’m Kris from The Big Boat. I’ve been having a great time reading all the lovely posts and ideas at Sweet Greens, so I was thrilled when I was chosen to be a Guest Greenie! I’ll share a few of my ramblings and ideas for greening up around the garden, since it’s summer and us Minnesotans spend all the time we can outside before the snow flies.

Have a Lovely Green Weekend

Hello, Everyone. Our first week of summer vacation is coming to a close. Based on the amount of time that we have spent hanging out by the pool and enjoying dinner on our patio, I would say it has been a huge success. Tomorrow, I want to get up early and hit our neighborhood yard sale (don’t you love when a huge neighborhood has a yard sale, so many great things that I can walk or bicycle around to see.) Then, Mr. Sweet Greens and I are going to do a litttle work on our house (touch up painting, decluttering and organizing the garage.) We are going to be selling a lot of things from our home in the near future, furniture, beer and wine making supplies, toys, clothing and books, so I need to start getting everything organized. Are you like me and love a great organization project? I am kind of a junkie, really, I should have been a professional organizer, maybe a future career?

The rest of the weekend shall be spent – you guessed it – by the pool. I also need to finish the arrangements for Eben’s 9th birthday pool party that will happen in the next couple of weeks. The party is going to be super minimalist, to reduce the impact on the environment. Plus, once you add children and water, do you really need anything else to have a blast? Also, should I bake a cake or cupcakes? Do you have a preference?

Stay tuned, next Thursday will start my Guest Greenie series, where I invite a guest blogger to share their green ideas, how to projects, recipes and recommendations over the course of week. Won’t this be a fun way to find new ways to be green? I have a great list of greenies lined up and if you are interested in becoming a Guest Greenie, then click here.

Have a fanastic green weekend.

Urban Chicken: Fab Homes for Hens by Frederik Roijé

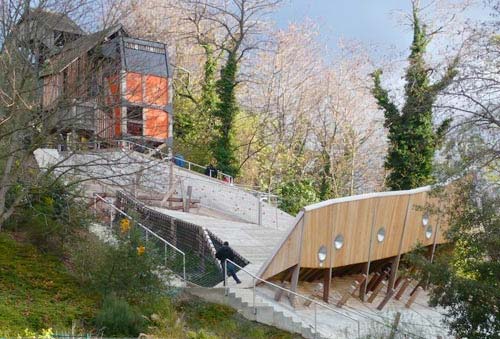
I just can’t help it, I want chickens! Did you know that? Do you live in an urban area that allows chickens? Lucky! The perfect retreat for your urban chickens: Frederik Roijé’s breed retreat. I would have my nose pressed up to the glass looking in – all the time. You?

Do you live somewhere that you can have chickens?
Would you ever consider raising your own chickens? Or does that sound like too much work?

PS: Do you get a chicken sitter while you are out of town – just like we do for our dogs?

The Home Depot: Do It Herself Workshop: Eco Gardening

When I saw that The Home Depot was offering a ‘Do It Herself’ workshop featuring Martha Stewart, I was intrigued. When I saw that the workshop would be on Eco gardening, I signed myself and one of my closest friends up.

The workshop was informative, however it wasn’t as geared towards Eco friendly gardening as it was towards traditional gardening. The workshop was 60 minutes, rather than 90 minutes and I would have loved to see the workshop focus more on the Eco friendly version of the different products that were available and learn more about the benefits of composting and water harvesting. Also, I never saw anything that was related to Martha Stewart at all. Nothing. I was looking forward to seeing what products Martha would have available for Eco minded individuals.

However, I did learn a few new things and the workshop was a great way to get away for an hour with a close friend, which is always fun. Also, if you are a gardening novice, the workshop would have been a great way to learn the very basics of starting a raised garden bed.

 Here are a few things that I learned:

1- When watering the plants in your garden, you should only use soaker hoses or water at the base of the plant. Watering on top of the leaves can cause molding, especially in tomatoes.

2- When fertilizing, choose an organic liquid fertilizer to stimulate vigorous growth and provide the largest yields, while improving your soil at the same time.

3- When planting your veggies, follow the planting instructions exactly. If it says to plant the entire tomato plant 2/3 under ground, that is what you need to do. The planting instructions will vary depending on the farming practices that were used to start the seedling and if you follow the directions exactly, you will get a higher yield.

Did you attend The Home Depot: Do It Herself: Eco Gardening Workshop in your area?
What did you think about it?
Was it completely geared towards Eco gardening?