
 by Jennie
How to Transform Leftover Bathroom Tiles into Polaroid Photo Coasters
 While cleaning out our garage last weekend (New Year’s Resolution #3!), I came across a small box of white ceramic tiles left over from a bathroom remodel that we accomplished many years ago. Instead of tossing them into the donation bin, I thought I could find a way to upcycle them. I considered transforming them into coasters, I have done this before using leftover tiles; however those tiles were different colors and textures, not stark white like the ones I had.
Then, on Sunday, we went to a local parade, while we were there a little girl asked if she could take a photo of Noodles (our Pug) – with her Polaroid camera! That is when I thought of my white tiles and how if I added a photo to them, they would look just like Polaroid photos!
When we arrived home, Eben and I spent the last few hours of winter vacation working on this fun project. I am happy to announce that not only was this a great little project to do with my favorite guy, that coasters turned out fantastically! We are now the happy owners of a fun stack of conversation starting Polaroid inspired photo coasters. The best part – my Polaroid photo coasters are going to be featured in this month’s Green Child Magazine. Hooray!
You can make your own set with my simple step-by-step tutorial, read on to get started:
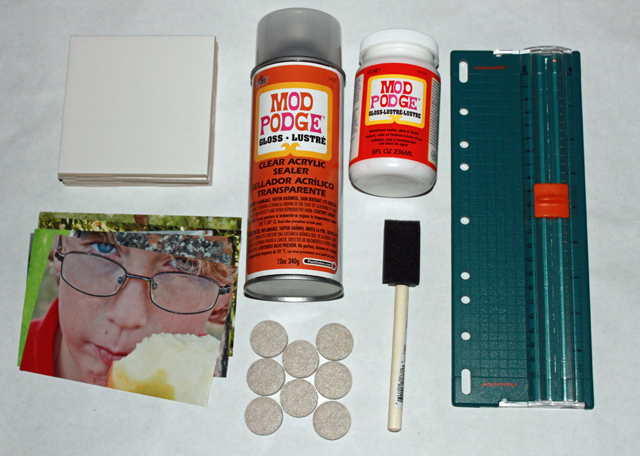
What you will need:
- 4×4 white ceramic tiles
- your favorite photos
- Mod Podge
- clear acrylic spray
- sponge brush
- paper cutter
- felt circles

Step 1: Pick Your Photos
First things first, you will want to pick out a selection of your favorite photos – one for each tile. Then, using a paper cutter, cut each of your photos down to approximately 3.25 x 3.75 – I eyeballed mine and I think they turned out great.

Step 2: Add the Photos
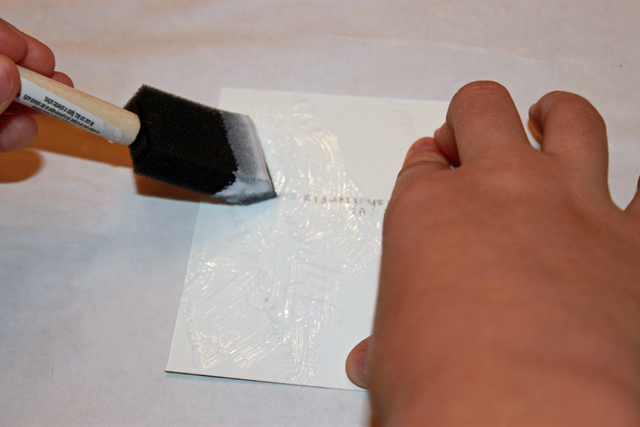
Wash and dry each of your ceramic tiles, then apply a thin coast of Mod Podge to the back of the photo. Then, position it correctly on your tile – do one photo/tile at a time.
Step 3: Press and Scrap
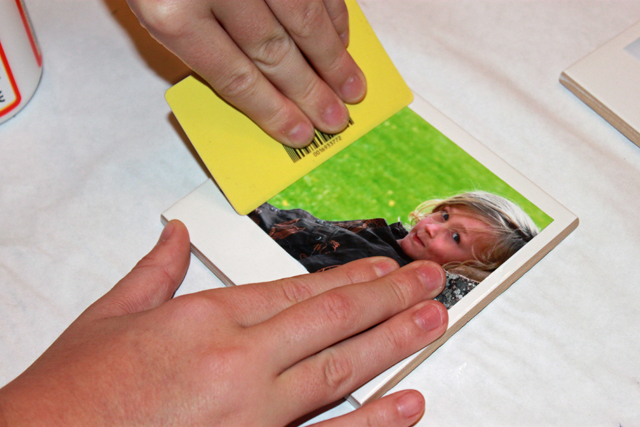
Use a credit card to smooth out the photo, scrapping off any excess Mod Podge. Make sure that the photo doesn’t slide out of place during the process.
Step 4: Top with Mod Podge
Use your sponge brush to apply a thin layer of Mod Podge over the entire surface of the tiles, including the photo. Let it dry for several hours.
Step 5: Repeat Step 4
Repeat Step 4 several times until you have a strong, thick coat of Mod Podge on the top of the photos (I applied 4 coats). Let it completely dry in between coats – this is very important, if you try to work to quickly the Mod Podge will still be tacky.
Step 6: Spray with Acrylic Spray
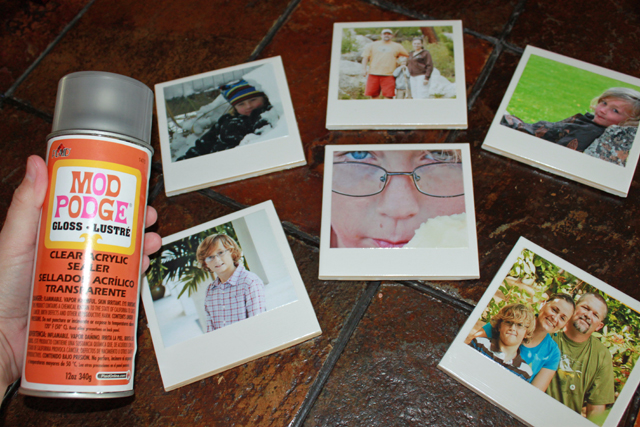
Spray each of the tiles with the clear acrylic spray using short, straight horizontal lines. Let completely dry for at least 15 minutes.
Step 7: Repeat Step 6
Repeat step 6 several times letting the spray completely dry for at least 15 minutes in between coats.
Step 8: Add Felt Dots
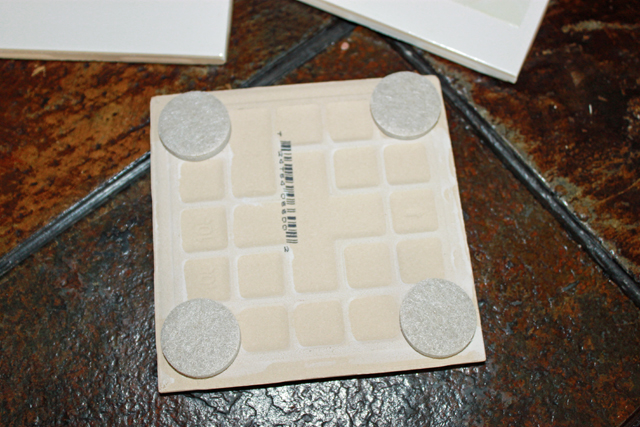
Stick felt circles (the same kind you use to put on the bottom of chairs and other pieces of furniture) on the back of the tiles. Wait at least 72 hours before placing anything on top of your photo coasters, allowing the sealer to completely dry – or your beverage mugs will stick!
Step 9: Enjoy and Share the Fun!
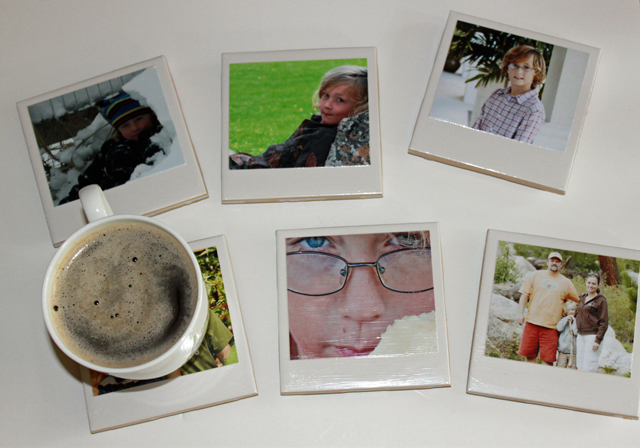
Enjoy these fun Polaroid coasters and share them with your friends and family when they come over for tea. Wouldn’t these make fun gifts too?